
Hi There! Today, I'm going to talk about how to create a diorama and photograph it for your Hot Wheels and other die-cast cars. Most of my die-cast collection consists of 1:64 scale cars, so this will be the focus of my discussion.
From the wikipedia definition, a diorama is a three dimensional miniature model. With respect to die-cast, we want to depict our favourite car or truck within a realistic setting. If we want to share our diorama with others, then we will want to take some decent pictures of it.
What you'll need
First I'm going to list the essentials for creating a diorama, then I'll go into some detail about each of those items. Let's begin:1. A die-cast car.
2. A table or desk and a desk lamp.
3. A backdrop.
4. A camera.
5. Optional accessories.
A die-cast car
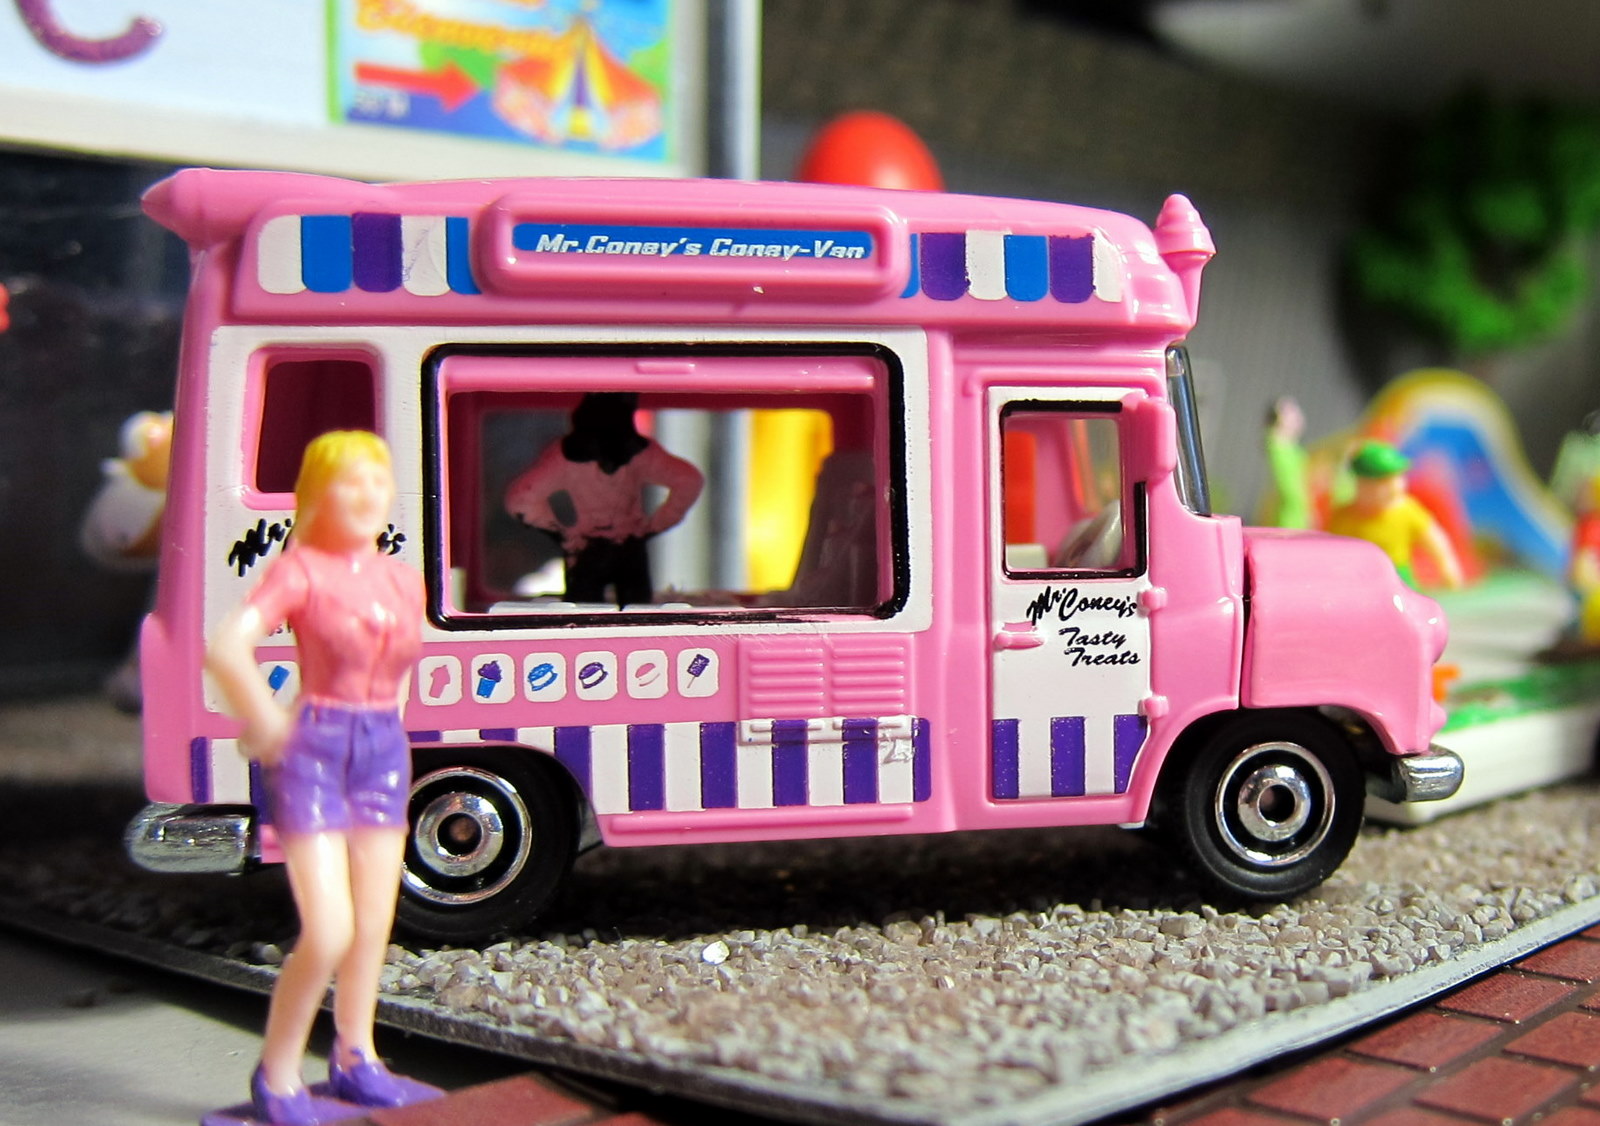
So you've probably got a favourite die-cast car or truck, like a Hot Wheel or Matchbox brand. How should you display it? Well, it depends on what type of vehicle it is. If you've got a race car, you might want to depict it at the track. If you've got a muscle car, maybe it's in a garage. If you've got a truck, maybe it's driving in a field or making a delivery.
The idea is to create a diorama that portrays the vehicle in a setting where you might normally find it.
So putting a race car in the middle of a cornfield or on a busy downtown street wouldn't make much sense.

Take a look at your die-cast model and envision how you want to display it. Then start to build your diorama around it.
A table or desk
So, this is pretty obvious but you'll need to display your diorama specifically for photographing. It's up to you how permanent your diorama is, but mine are always temporary. Once I've captured it on camera, I tear it down because frankly I don't have a lot of space to put everything.
Your tabletop or desktop should provide enough depth (distance from camera lens) to allow different camera angles and give your pictures a greater depth of field. I recommend that you work with a space of at least 2 feet wide by 2 feet deep. Now mind you, there are always exceptions.

For example, this simple little diorama is about one foot deep by one foot wide and was positioned on my Ikea bookshelf. The building in the background is only about 1.5 inches deep giving me about ten inches of remaining depth to play with. I placed the yellow Hot Wheels ramp truck up against the building but brought the Hot Wheels Chevelle race car closer to the camera lens. This allows me to differentiate the subject matter (blue chevelle) from the background (building and ramp truck).
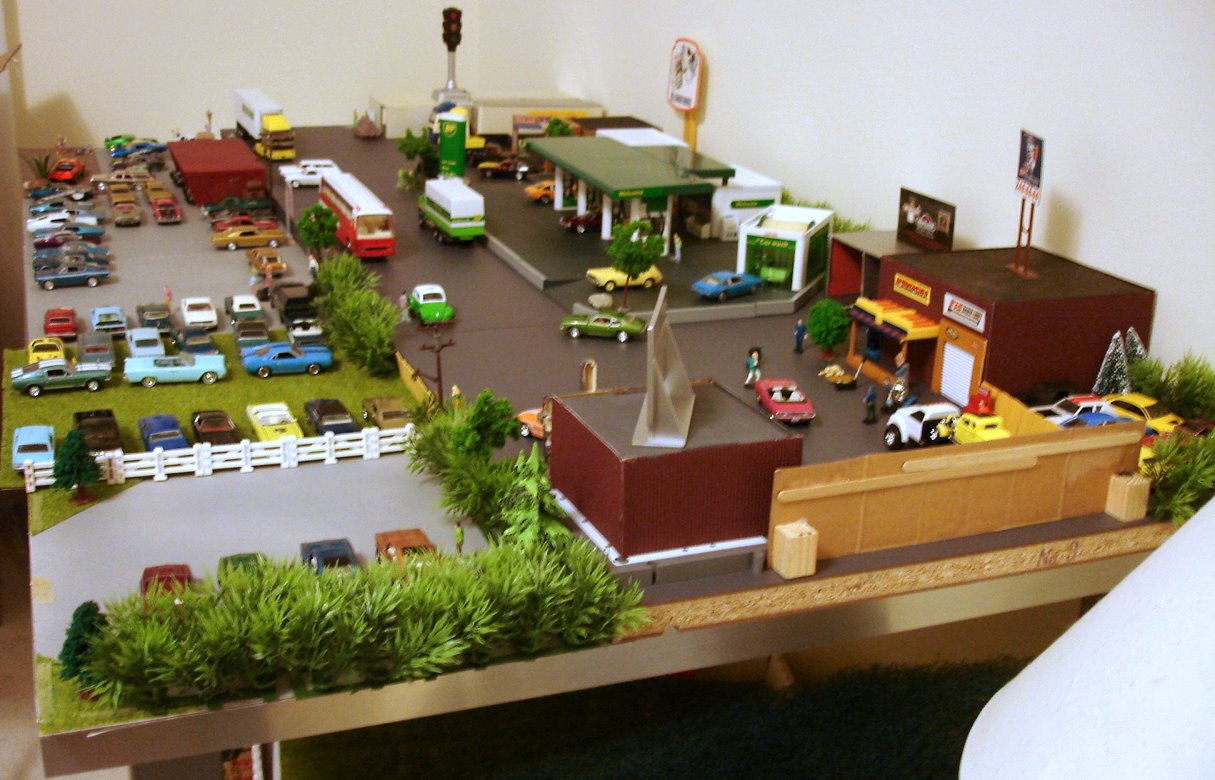
The more room you have to work with, the richer in details your diorama can be.

In the picture above, the Chevy Suburban showroom is about a foot and a half deep.
An overhead lamp
I can't stress how absolutely critical it is to have an overhead lamp above your diorama when taking pictures of it. Your camera will need the light to properly capture the scene. And the light will help to establish a mood and also put focus onto the car which you are featuring in your picture.

Ok, so let's put what we know together so far.
We need a feature vehicle. Johnny Lightning Jeep Cherokee. Check.
We need a table that can give us a visual depth of about 2 feet. Check.
We need an overhead lamp. Check. Wait, where's the lamp?

If you look carefully, you'll see that I've setup this diorama on the bathroom counter, Lol. 2 foot depth remember? I probably could have gotten away with one overhead light but I opted for two in this shot.
My floor lamp is from Ikea, it has a gooseneck so I can position it directly over my shot, without taking up additional real estate. But you could light this shot with a desk lamp from Walmart. Just make sure it has a goose neck so you can position the light how you want it.
A backdrop
What's a backdrop? For me, it's anything that will serve as a background to my diorama. It can be as simple as something as a DIY building or a picture I printed off the internet. Or you can buy something from a toy store or dollar store.

I found a picture of a tree on a hill with a blue sky from the internet. It serves as the backdrop for this shot. The Toyota Land Rover sits on a sheet of grass mat and I added a small deer. That's all there is to this shot.

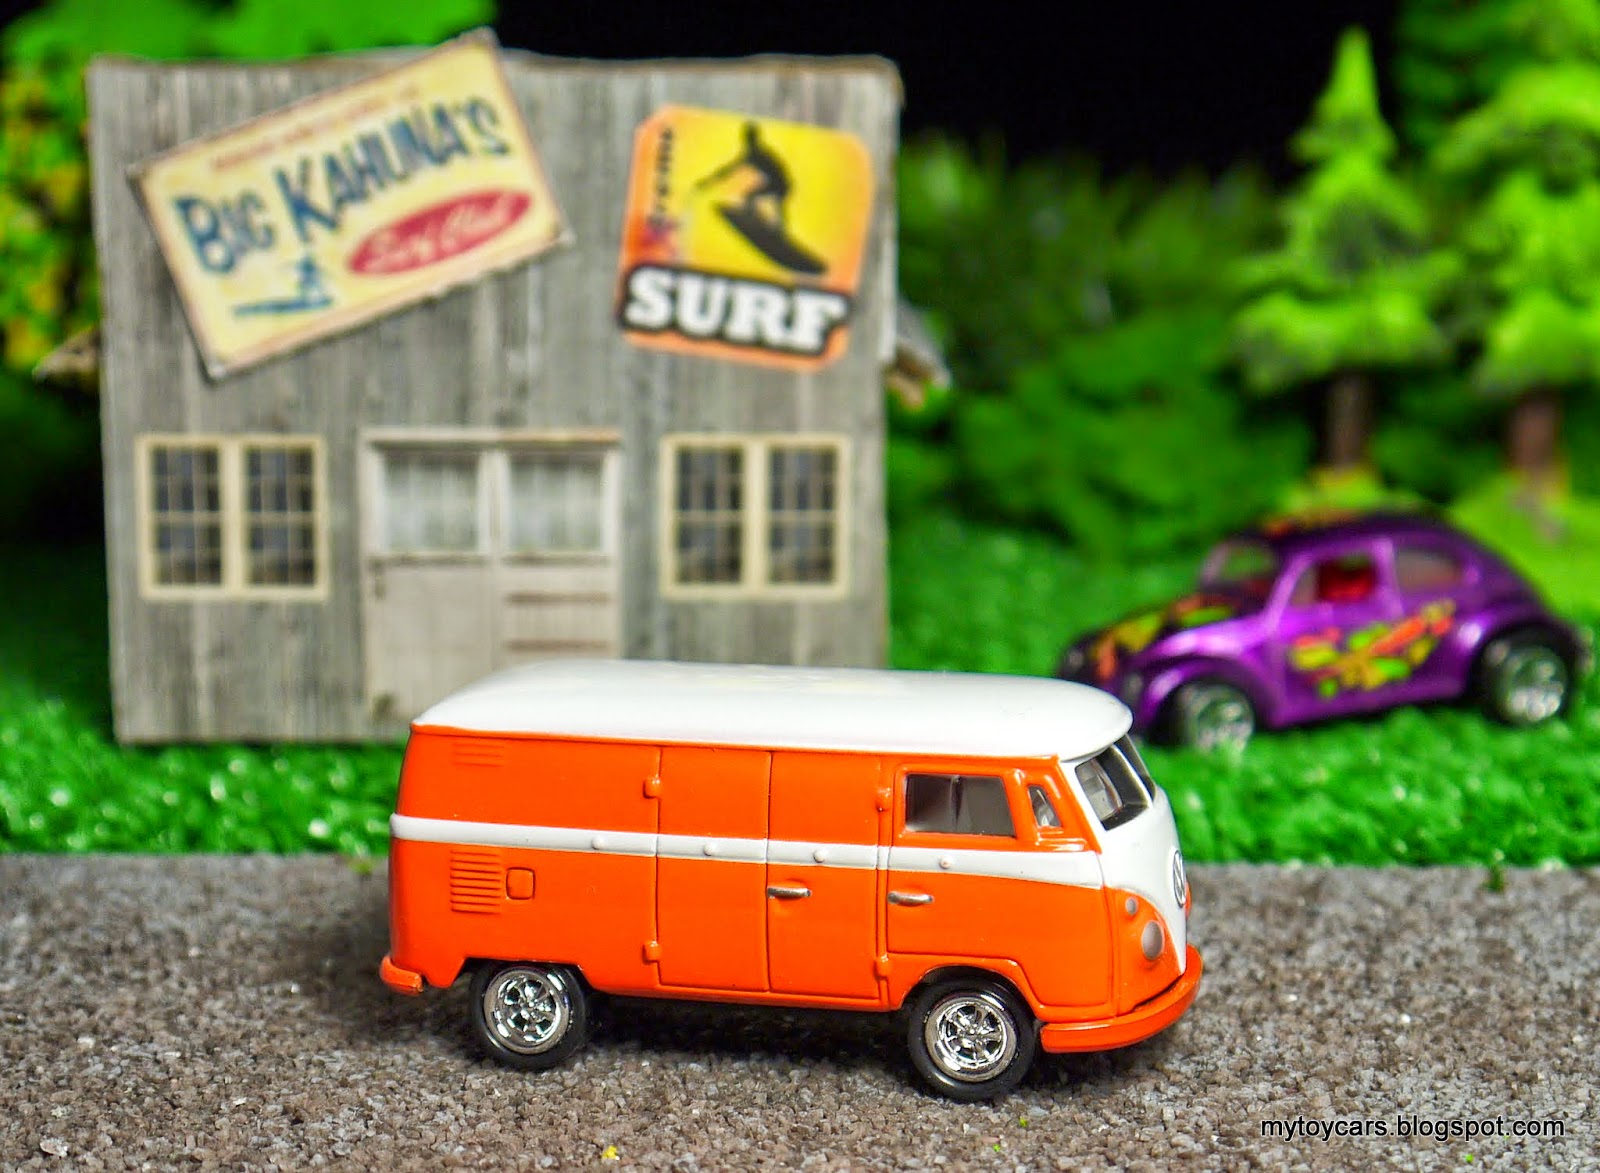
The surf shack in the orange VW pic is made out of cardboard. I printed the images off the internet and glued it to some cardboard. The yellow fence? It's made out of popsicle sticks which I painted yellow. Surfboards came from the Hot Wheels models: Surf Crate and Deora.


A camera
Ok, this is where we have to get technical. What kind of camera do you need to take shots of your dioramas? You want to have some control over the camera settings, specifically the Aperture and Exposure levels. So your camera should have these settings on it. Check your camera manual if unsure. Some point and shoot cameras have these settings. Most mirror less and four thirds cameras will have them and all DSLRs will have them for sure.
The Aperture setting controls how much of the picture is in focus and is especially useful for taking pictures of your die-cast because typically you want the car to be in focus and the background to be slightly blurred. See how the fire fighter above is focused where the background is blurred?
You can also set the Aperture to focus clearly on both the foreground and the background. The Japanese buildings and the cars from the previous picture are in focus because I wanted to show both of them. I did this by setting the Aperture to F11. Google camera aperture to learn more.
Exposure just means how much light is in the picture, ie how light or dark it is.

In this picture, I turned off the room lights and just shone my table lamp onto the cars. In order to make sure you could see the cars, I had to control the exposure on the camera. Here's some more examples.


And here are some pictures with a lighter background.


Also, when taking pictures, it's best to mount your camera to a tripod instead of holding it. This will ensure that your pictures aren't blurry or suffer from the shakes.
Optional Accessories
Your die-cast diorama will look perfectly fine with just your car and a simple backdrop. But if you want to make your pictures even more interesting, you want to add details to the dioramas, such as figures, foliage, additional cars and buildings, etc.

It's really up to you, how much stuff you want to add to your dio pictures, but be careful about going overboard. If you want to showcase a car, then keep the background simple. If you want to do a bigger display then add more details like street signs, other cars and such.
Ok, that's it for this long post. Hope this helps you get started and feel free to add questions or comments in the box below.